You don’t know
squat. That is about to change.
I am not a physician,
so please talk to your doctor. Make sure that you are, in fact, healthy enough
to start lifting weights if you are not already doing so.
The squat is far
more technical than most people give it credit for. Over the years, the squat
has been heralded as perhaps the one exercise that many would do if they were
in a position or place that restricted their movements. If they were unable to
do much, the one exercise would be the squat. At higher repetitions, it makes
for an amazing aerobic technique. 315 squats are the cardio-vascular equivalent
of running one mile. The difference being, if done by dropping butt-to-ankles,
you are getting a fuller range of muscular engagement than if you were out
running or jogging that mile.
Under weight, squats
have the tremendous attribute of engaging most of the muscles in your body. By
doing this, the body will respond by increasing the release of testosterone,
growth hormone, and cortisol. I have an earlier article about how compound
exercises trigger this biochemical release and you can find it here.
The first question I
hear is about how squats affects the knees. I have been squatting heavy on and
off for a little more than 20 years. In my experience and through reading
multiple sports science studies, with the proper form, squats will not
negatively affect your knees.
The key is with
proper form.
The first thing you
must do is find your stance. You must know how wide apart your heels must be
and what angle your feet should be at. This is paramount. Without finding the
base-stance, you are going to hurt yourself eventually.
How do you find your
stance? This was taught to me by a powerlifting coach way back when at a place
in Cedar Hill, Texas. The gym is no longer there, but John Tyree, my former
coach, still is. He is running a few places around there and Duncanville,
Texas.
Anyway, to find your
stance, this is what you do. John came to me one afternoon and what he said
confused the daylights out of me. “Put your hands on the back of your head and
squat down. All the way down.”
That is just what I
did. He did it, too. There are the two of us, just about sitting on our heels,
and I was thankful I didn’t have spurs. “What’s this about, John?”
“Check your feet.
Waddle around and get comfortable,” was how he responded.
Afterwards, we just
kind of talked for a few minutes. He finally told me that this was his way of
helping me find my squat stance. Once my feet were wide enough apart and angled
in such a way that I could stay in one position and talk, that was my squat
stance.
Back at the mirror,
I squatted down and studied my stance. I thought about it and looked at it from
every angle I could before shouldering any weight.
This is what you
should do first.
Find your stance.
 The second thing is
to find the most ideal place to set the bar on your shoulders and neck. I am
referring to back squats and not front squats. Typically, most people, myself
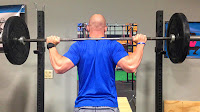
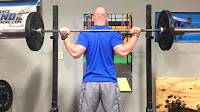
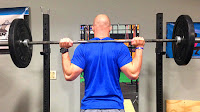
included, begin by placing the bar high on the neck and shoulders. Let’s look
at these pictures found at T-Nation.
 Take note where the
bar is placed and where this gent has placed his hands. Technically, this is
not a bad position. You can flex your traps up against the bar while pulling
your scapulae – shoulder blades – back and into each other.
Where you place your
hands will have more impact on the stability of your upper body. The closer in
to your shoulders you place your hands, the tighter your shoulders will be.
This allows you to engage your latissimus dorsi to stabilize your upper body
when squatting. Back in the day, I appeared lackadaisical in my squats due to
my hand position. I would take an awkwardly wide hand position and flop my
hands over the bar. It must have looked as if I were just hanging out with the
barbell across my shoulders. Somewhere along the line, I narrowed my grip. I am
experimenting now, consciously, with my hand placement. This does not seem to
change how the exercise is performed.
 The hand position
you choose is up to you. Pick your hand width to your comfort based on how you
need to balance, breathe, and feel the most comfortable.
So, you’ve selected
to place the bar either on the top of your traps or where your traps insert at
your scapula, you have your proper stance, and you have your grip width set.
Now, you squat, right? Not exactly.
You need to lift the
weight off the rack first.
This is about a four-inch
squat. Use proper form. Set your stance. Set your grip width. Check yourself. Breathe
in. Head up slightly. Shoulders back. Lift.
Alright, head up and
shoulders back. These are paramount to your form. Form is as important as breathing.
You will now do
several things at once. While the weight is still racked. You have your footing
and hand grip set. You are pressing up against the bar at the point you have
decided to set it. Before taking the full weight, you will shrug your shoulders
up and squeezing them back.
By shrugging up you
are bringing your trapezius muscles into play and firming up the back of your
neck. If your legs are the foundation and your back – by way of the erector
spinae – and abdominal core, you make the pillar that holds your shoulders
upright. Your shoulders become the shelf upon which the weight will rest. By
squeezing your shoulder blades back, you are locking your upper back in an
upright position with your chest forward. By locking your upper back in this
position. you prevent yourself from rolling your shoulders forward and hurting
yourself.
Your hips also are
required to be back. It may feel odd. It may even look a little odd. If, when
looking at someone from the side, their hips, spine, and back look like a
capital C, or something trying to be one.
While squatting
down, imagine you are looking for a seat with your butt. You are reaching back
with your butt to find the edge of a seat. This generally helps most squatters
to keep their lower back in the proper position. Also, focus on keeping your
shoulders up straight.
Why not Box Squats? A
box squat uses a box. The squatter descends until touching a box with his or
her butt. This is the point at which the ascent begins. The problem is that,
with heavier weights, the light tap on the box, becomes a heavier jarring. The
heavier and harder that jarring is, the more compression on the spine there is.
The more compression on the spine, the more pressure and damage to the cartilage
disks between the vertebra. Another issue is that the box limits the range of
motion. If the box is too high, then you will not get deep enough in your
squat. The result is that you will not fully engage all the leg muscles. Thus,
you are stunting your own development in strength, power, and growth.
How deep should I go
when squatting? If you are competing, check the rules and guidelines for the
organization you are competing with. A rule of thumb is that there is a crease that
forms at the point where your thigh and hip bend. This crease must at least
meet the horizontal line with your knee. All competitive lifting organizations
have a method of alerting the lifter of when the lifter can begin the positive
portion of the lift. Do your due diligence to ensure that you are meeting the
standards of the organization you are lifting with. For instance, I competed
with US Power Lifting Federation (USPLF) and World Association of Bench
Pressers and Deadlifters (WABDL). Each one had their own standards for each of
the lifts and the range of motion required.
How deep should I go
for my own personal training? As deep as your body can go and just a little bit
further. That is, until you hit the crease and knee joint alignment described
above. If your current range of movement is stiff, allow the weights to stretch
you into the range. You know your body. If there is a pain that leans toward
injury, stop. Stop immediately. Muscle soreness is one thing. Injury related
pain is another.
When you have stood
back up, do not lock your knees. While shouldering the weight you should not
have your knees locked for any reason. This places undue stress on these
important joints. Again, when under weight, do NOT lock your knees.
I mentioned earlier
that breathing is a vital detail. At the top of the squat, inhale. While
descending you will hold your breath. Hold your breath ONLY while descending, At
the bottom of the squat, begin your ascent and begin to exhale. Exhale throughout
your ascent. If you still have air to exhale when you reach the top, that is
fine. Let the rest out. Taking a few breaths while at the top is fine, too.
Sometimes, I inhale and go right into the next rep. Sometimes, it’s one breath
and another inhale then squat. Other times, there are a number of huffing and
puffing breaths, freight train kind of puffs, before the next repetition.
Quick recap
1.
Find your proper stance and foot width
2.
Hand position on the bar
3.
Place the bar on your back or neck
4.
Lift the weight
5.
Head up, shoulders back and shoulder blades
squeezed, hips back
6.
Hips/Thigh crease meets parallel with the knee
7.
Knees flexed
8.
Breathe
No comments:
Post a Comment